


Description
Additional Features
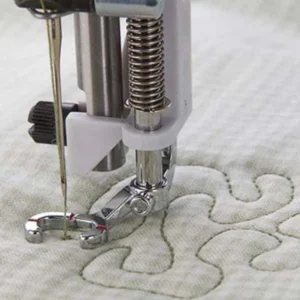
- Needle hole in the foot allows for needle position to be adjusted
- Sew either 1/4″ or scant 1/4″ seams
- Red markings 1/8″ apart provide help and precision to navigate corners and fabric edges
How to Use for Piecing:
1. Snap on the Adjustable 1⁄4” Foot with Guide.*
2. Select a straight stitch.
a. For a 1/4” (6mm) seam; select a centered the needle position.
b. For a scant 1/4” seam; adjust the needle position one or two steps to the right.
3. lace the fabric pieces right sides together under the presser foot, aligning the edges of the fabric with the guide on the foot.
4. Sew the fabric pieces together guiding the fabric so that the edges touch the guide. 5. Press the seam allowance.
Note: Depending on the weight of your fabric and thread it may be necessary to adjust the needle position to achieve your desired seam allowance. Move the needle to the right to decrease the seam allowance and to the left to increase it. You can safely move the needle three steps in either direction, but not more.
* Do not use the Straight stitch plate when using the Adjustable 1⁄4” Foot with Guide.
How to Use for Topstitching:
1. Snap on the Adjustable 1⁄4” Foot with Guide.
2. Select a straight stitch, triple straight stitch or the mock hand quilting stitch. Adjust the needle position as desired if needed.
3. Place the project under the presser foot so that the guide on the foot runs in the ditch of the seam or along the edge of the fabric.

Reviews
There are no reviews yet.